|
How to Track Your Money!!!! 
Click the Billing Button 
You may View Bills by specific Search Criteria.
Bill ID: To View a specific bill by bill#, enter the Bill ID #.
Clinic: Select the clinic from the drop down list to display Bills for a specific clinic.
Provider: Select the Provider from the drop down list to display Bills for a specific Provider. Date Range: Select the Date Range from the drop down list to display Bills for a specific Date Range. 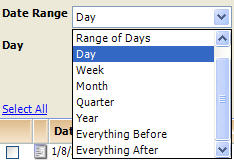
Date: Displays Date
Payor: Select the Payor from the drop down list to display Bills for a specific Payor. 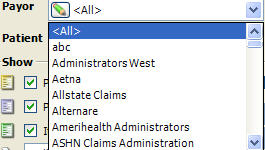
Patient: Click the Select button and select Patient to view Bills for from the Rolodex.
 Note: You can view specific patient's bills from the patient file, Bills Tab. Note: You can view specific patient's bills from the patient file, Bills Tab.
Show: Select which Type of Bills to Display (Check to Display, Uncheck to Not Display)

Created By: Select the User from the Created By drop down list to display Bills created by a specific user.

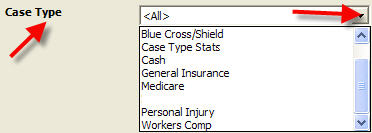
Case Type: Select the Case Type from the drop down list to display Bills created for a specific Case Type.
 Example: Workers Comp, Personal Injury, etc. Example: Workers Comp, Personal Injury, etc.
Electronic: 
- Select Only HCFAs sent electronicaly to view bills submitted electronically
- Select Only HCFAS not sent electronically to view bills that were not submitted electronically

Tracers: 
- Select Only HCFAs with Tracers to view bills with Tracers
- Select Only HCFAS without Tracers to view bills without any Tracers

SOAP Notes: 
- Select Only HCFAs with Notes to view bills with SOAP Notes
- Select Only HCFAS without Notes to view bills without any SOAP Notes

Misc.:
- Select to view bills
- Select to view bills
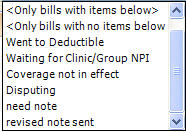
- Select Went to Deductible to view bills
- Select Waiting for Clinic/Group NPI to view bills
- Select Coverage not in effect to view bills
- Select Disputing to view bills
- Select Need Note to view bills
- Select Revised Note sent to view bills
Balance: Select from the drop down options to filter Charges, WriteOffs, Disputed Amounts, Balances, etc.
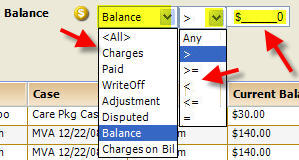
Select All: Click Select All to place a check mark next to all displayed bills, based on the search criteria


View: Place a check mark next to a bill(s) you would like to View and Click the View Button.
Print: Place a check mark next to a bill(s) you would like to Print and Click the Print Button. Send: Place a check mark next to a bill(s) you would like to Send (Electronically) and Click the Send Button. Other Options: Select an option from the Other Options drop down list
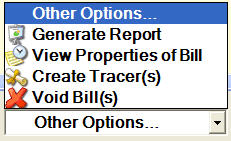

Return to Billing Return to Reference Guide Generate Report:
Click the Other Options drop down and select Generate Report. A Report will be generated based on your filter criteria.

View report, or click the Print this Report button to Print.

Return to Billing Return to Reference Guide View Properties of Bill:
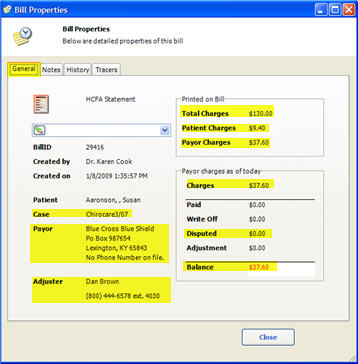
Select a bill and click on View Properties of Bill from the Other Options drop down list.

View Properties of Bill - General Tab: - Total Charges
- Patient Charges
- Payor Charges
- Paid
- Write Off
- Disputed
- Balance (of bill)
are all displayed.
Additionally:
- Bill ID
- Created By
- Created on (date)
- Patient
- Case
- Payor and information*
- Adjuster Name and Phone Number*
*  Note: Eliminates looking in a file Note: Eliminates looking in a file
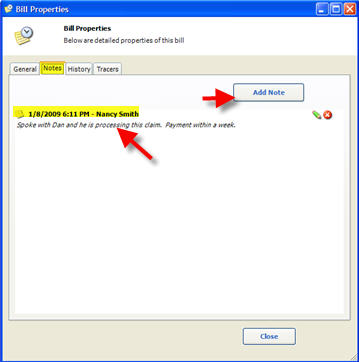
View Properties of Bill - Notes Tab: All notes previously entered regarding this bill are displayed, including the date, time and User who entered the note.
 Note: The date, time and User who entered the note are automatically included in the note Note: The date, time and User who entered the note are automatically included in the note
Add Note: Click the Add Note button to add a new note.
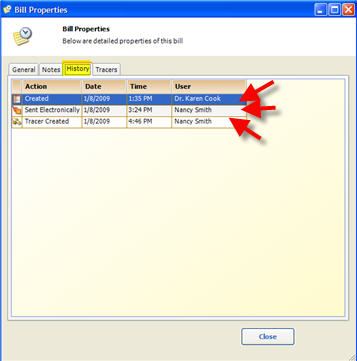
View Properties of Bill - History Tab: View
the History of the Bill. The following information is updated
automatically each time a Bill is Created, Sent Electronically, or a
Tracer is Created.
- Action (Bill is Created, Sent Electronically, or a Tracer is Created)
- Date (Bill is Created, Sent Electronically, or a Tracer is Created)
- Time (Bill is Created, Sent Electronically, or a Tracer is Created)
- User (Which User Created the Bill, Submitted the Bill Electronically, or Created a Tracer)
View Properties of Bill - Tracers Tab: The Tracers Tab displays any Tracers that have previously been created.
Print Button: Place a check next to a Tracer and click the Print button to Print the Tracer.
View Button: Place a check next to a Tracer and click the View button to View the Tracer. Create New Tracer Button: Click the Create New Tracer to create a New Tracer 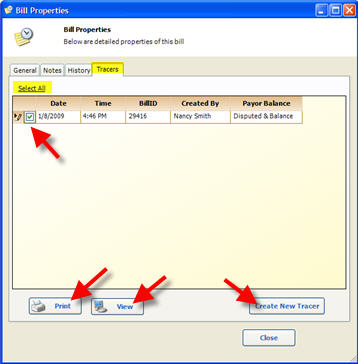
When you click the Create New Trace button the following window opens:
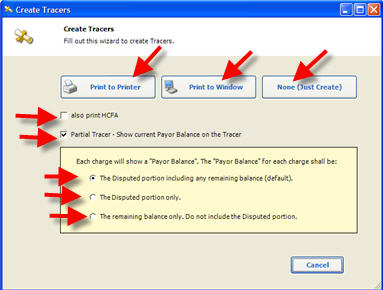
Print to Printer: Click Print to Printer to Print Tracer
Print to Window: Click Print to Window to Print Tracer to window None (Just Create): Click None (Just Create) to not print
Also Print HCFA: Click Also Print to HCFA to print a HCFA with the Tracer.
 Note: Make sure you have a HCFA form in the printer Note: Make sure you have a HCFA form in the printer
Partial Tracer - Show current Payor Balance on the Tracer
 Note:
So cool. Quixote is one of the few software programs that will print a
partial tracer. Usually the software just reprints the original
tracer, the insurance company sends it back saying "already paid" and
around and around we go. Note:
So cool. Quixote is one of the few software programs that will print a
partial tracer. Usually the software just reprints the original
tracer, the insurance company sends it back saying "already paid" and
around and around we go.
Each charge will show a "Payor Balance". The "Payor Balance" for each charge shall be:
- The Disputed portion including any remaining balance (default)
- The Disputed portion only
- The remaining balance only. Do not include the Disputed portion.
 Tracer Example: Tracer Example:
Page 1

Page 2
 Related Articles:
No related articles.
|